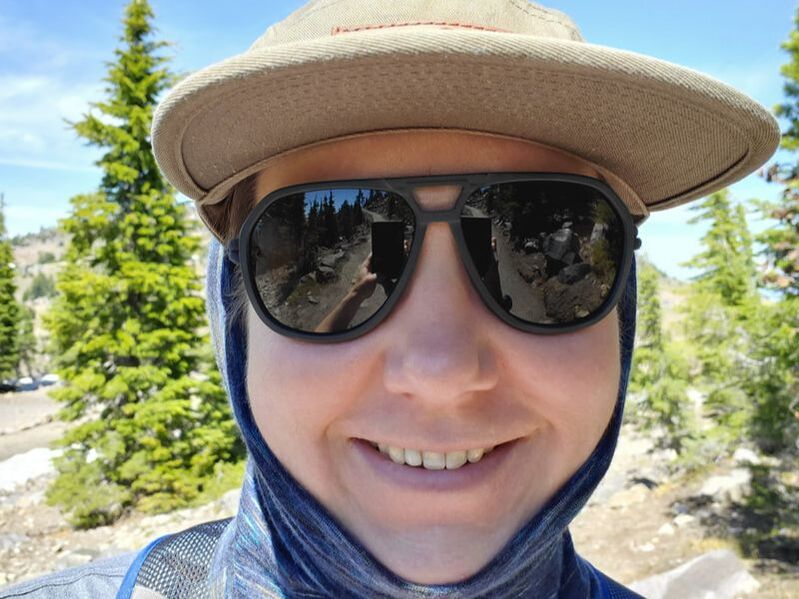
Over three Zoom sessions during the month of February I completed a Smartphone Photography class with the Mountaineers. I love taking photos in the wild, beautiful places that I visit and this course was great training to demystify "the eye" of photography. This post outlines many of the basic principles of photography that I learned in the course. I hope you too will benefit from these principles to capture even better shots in your own personal photography! Since moving to the Pacific Northwest I have become more and more interested photography. I mean who wouldn't - it is just absolutely gorgeous here. I also really enjoy capturing my experiences and sharing back to my family and friends across the country. My goal is to always tell a story (by image and text) to help others feel as if they were along with me on the journey as well! At first I was simply "pointing and clicking", just snapping photos with zero thought put into it (because I didn't know what to think about). Amazingly, the photos always turned out pretty good. Probably because smartphone cameras are really great quality these days and (again) it is just that beautiful out here! The more I went out adventuring and reviewed my photos at home, I started noticing various aspects of my images. Such as when the light was good or bad. How using each of the different lenses on my phone made the shot look and feel different. Things started catching my eye on the trail - like bright green moss making a contrast on a dark tree trunk. I started to take more deliberate shots, looking for what stood out to me or pleased my eye. Over time like this I've become more and more interested in the "art" of photography. Signing up from the Smartphone Photography class was the next step to actually receive formal training in the basic principles and to be able to apply them to my photography going forward. Outlined in this post below is what I learned in the course - combined with my personal photos and musings. A few things to note before we get started:
You Are The Artist
The first thing to pass along about photography is that...You are the artist! I have never thought of myself as an artist. Frankly, I have next to zero artistic talent of any kind. But after taking this course I truly believe that photography is an art form. As the photographer, your objective is to work with whatever is in front of you to create an image that tells a story. Story What is the story you want to tell to connect with your viewer? Whether you are out on a mountain peak, spending time with your kids, or doing the day to day routine, why did you want to take a picture? Your photos want to tell a story, so why did you pick up your camera and what story do you want to people to walk away with? Character Every story starts with a character. Who or what is the character of your photo? What is the character asking you to say about them? In photography speak, the character is called the subject of your image. Again it can be the mountain peaks, your kids, or some random object. Is your character interesting and helping to tell your story? Let's face it, I will not read very far into any book with a boring character. Same with a boring photo. Your Personality Remember you are in every photo - your perspective and your point of view. After all, you are the artist who created it. Let your personality, your feelings, or perspective shine through! What spoke to you to take the photo? Try to see if you can get that personal feeling (that you felt in the moment) to come across in your image. Photography as Art Closing Thoughts The next time you say "oh, I should take a picture of this", think about it from an artist's perspective before you take the shot. You are not just taking a picture, but rather you are creating art with the purpose of telling the viewer a story. So, it is up to you how you want to tell that story. A few good questions to ask yourself before you snap that photo:
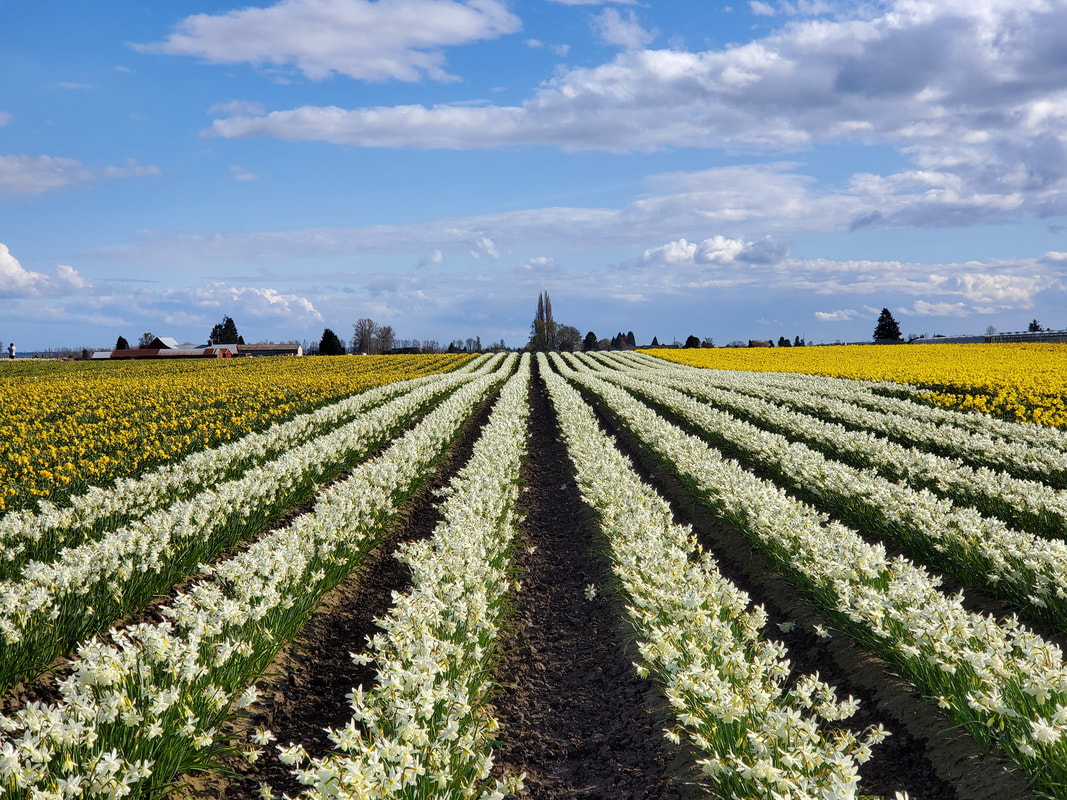
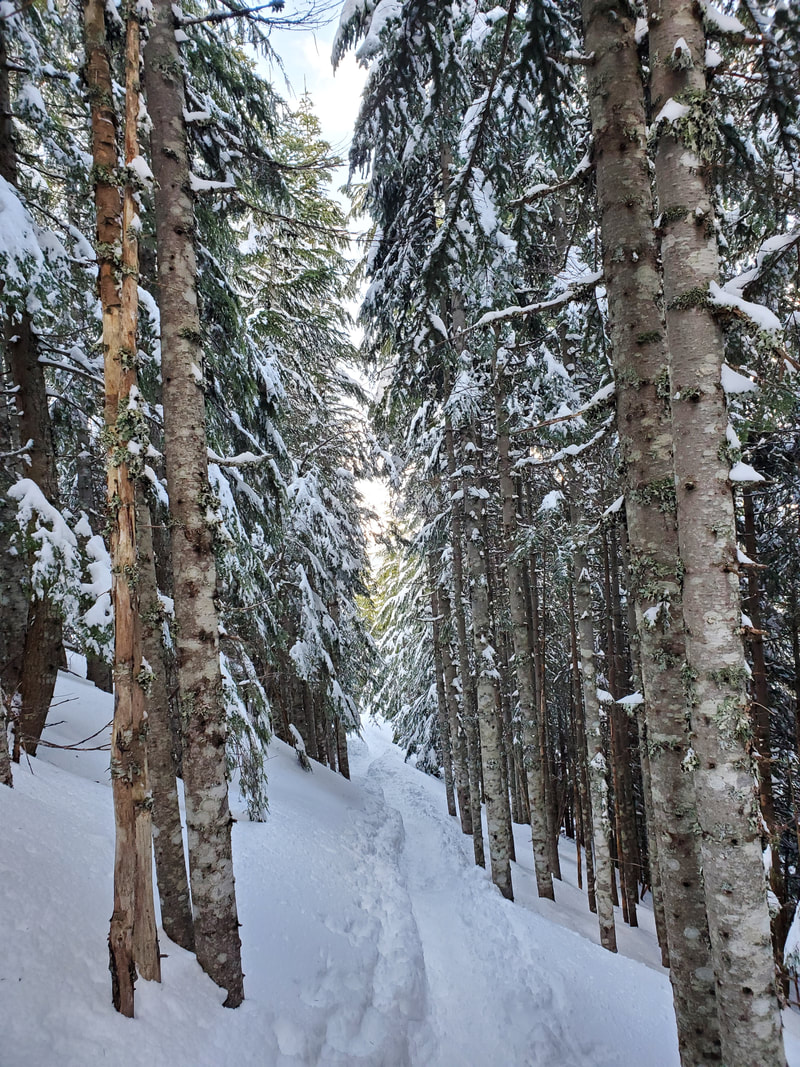
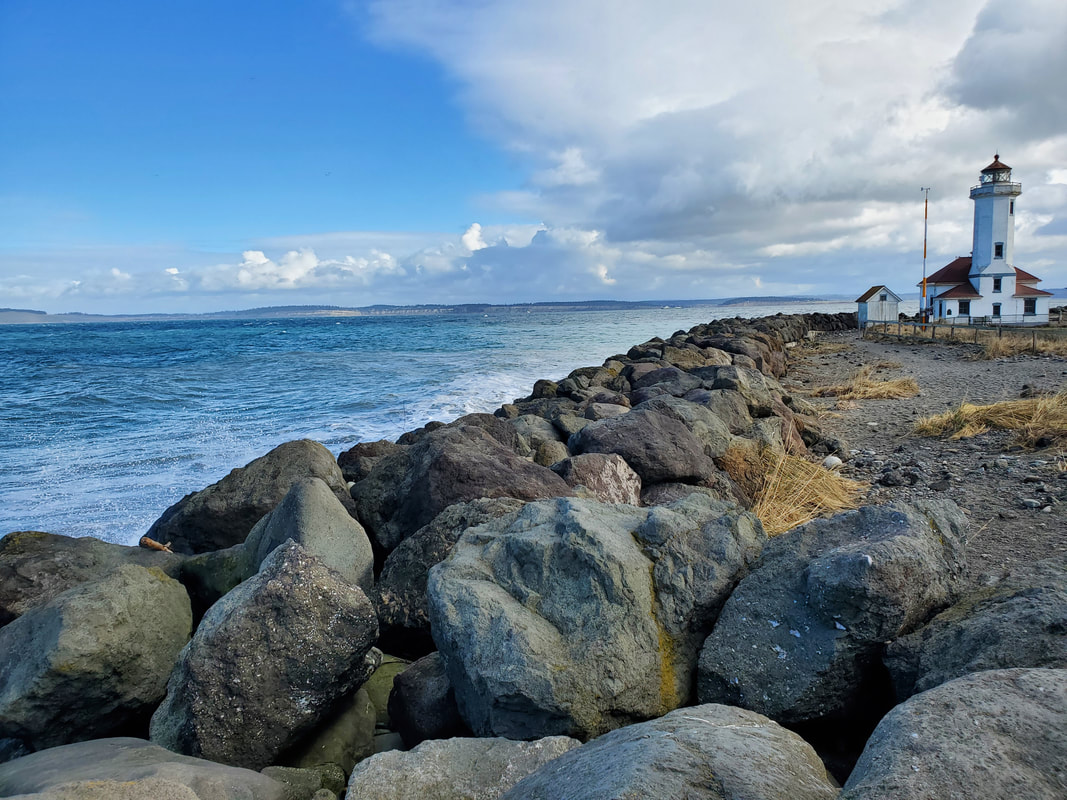
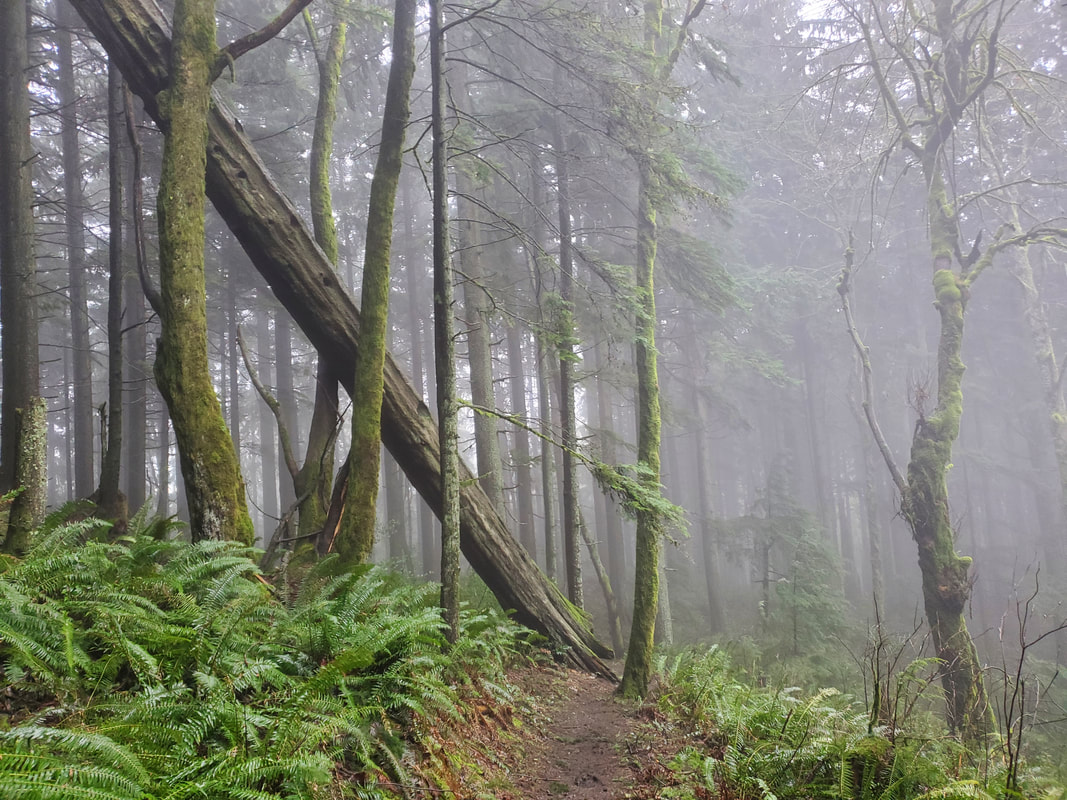
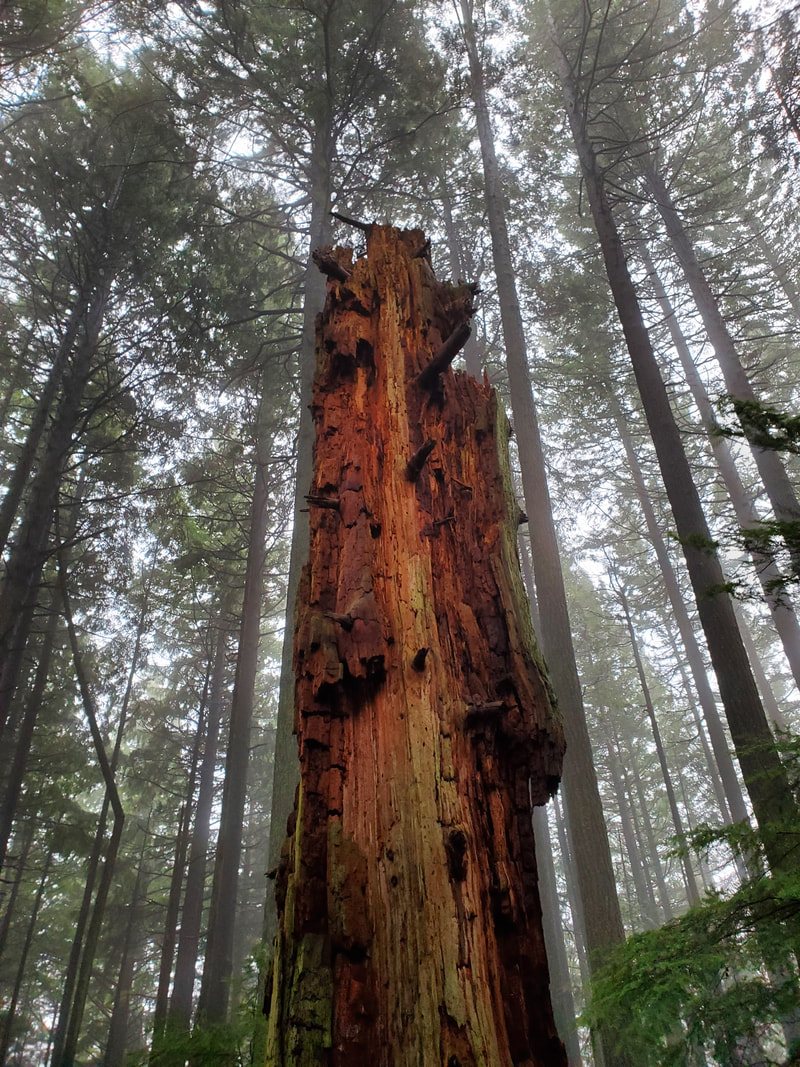
One thing I learned through this course, that I try to practice now, is what I will call active looking. That is proactively looking through the lens of the artist for what catches your eye, the small details, or interesting colors, patterns, and lines. It is easy to be somewhere, but not really see it. A bit conceptual here, but once I started "looking" I began to notice all kinds of interesting things. I truly believe that just thinking about your photography as art will change your perspective and help you see better photo opportunities all around you.  Above is a picture I took last weekend while scrambling on Mount Rainier. It would be easy to not see these small features on the huge mountain. But what caught my eye was the green ground cover and little trees sticking up through the snow. I wanted to show the dichotomy (size, color) between the fragile green and the harsh, snow covered landscape. CompositionNow that you are thinking about your photo as art - How do you actually compose a great photograph? Well to start, imagine you are a musician and you want to compose a new piece of music. You already know the story you are trying to tell with the music, so your objective is to arrange all the notes together in a way that is pleasing to the ear, captivates the listener, and best tells your story. Composition in photography is no different. It is simply the way you order the elements of an image to make people spend time with it. Mind blown...I never thought about there being elements of an image before. I simply took pictures! How you control the composition of a shot (or those elements) plays a huge part in creating a captivating image. You often hear that someone has an "eye for photography". Well a large secret to that "eye" is simply knowing how to compose a visually pleasing shot. There are four key principles to help you compose a great shot: Lines and Curves, Patterns and Texture, Rule of Thirds, and Fill the Frame. I have outlined each below, followed by my personal examples to help illustrate. Lines and Curves Lines and curves serve the purpose to lead the viewer through the image. They say "we’re going on a journey somewhere" or "let's go investigate something". When using lines and curves, you are telling someone to follow you along because you are pointing out something further along in the image.
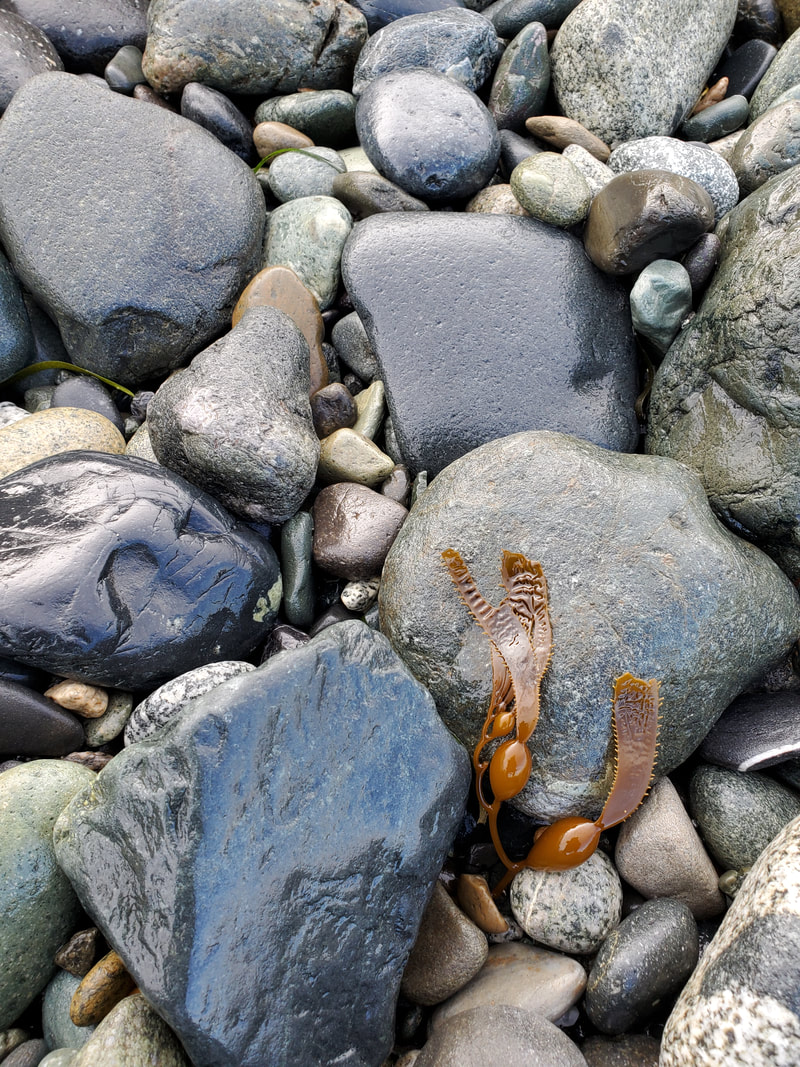
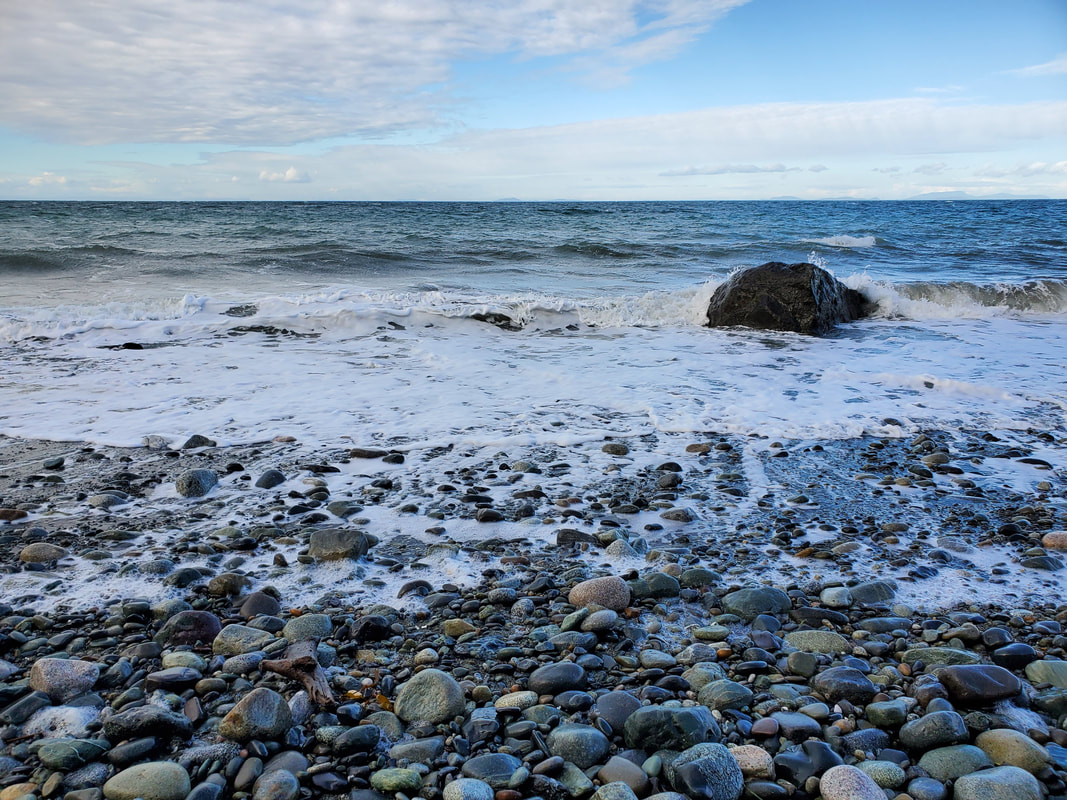
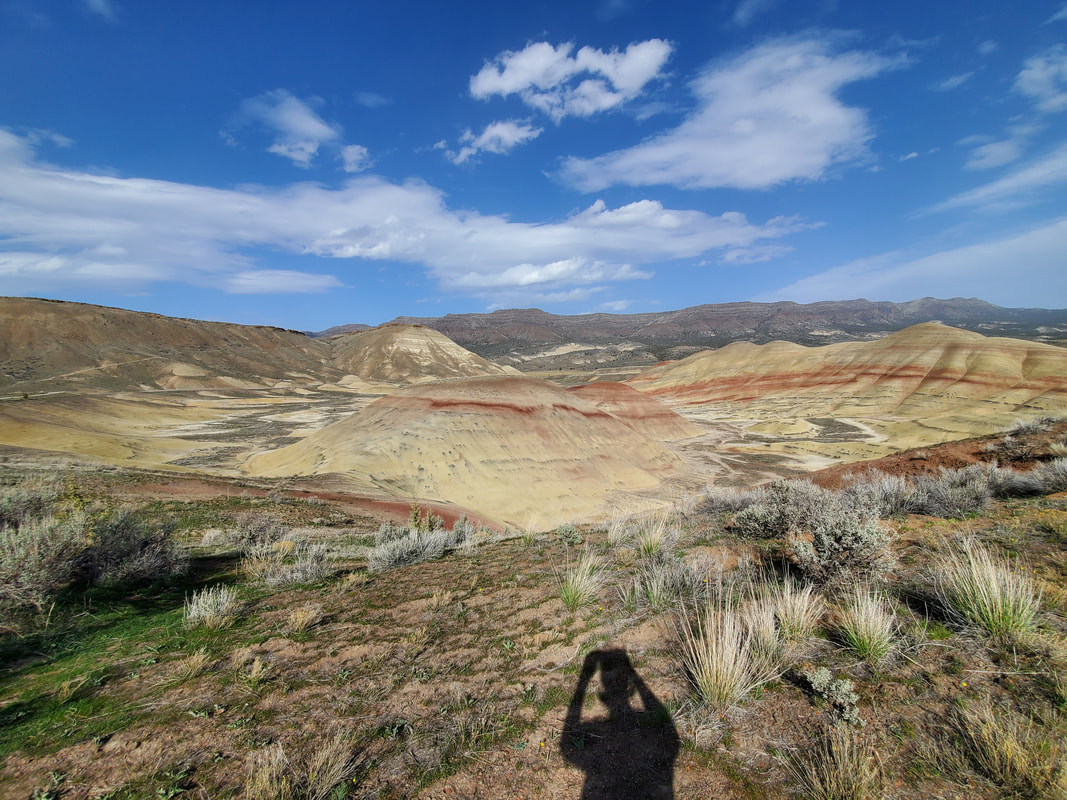
Patterns and Textures Patterns and textures in photographs are good for abstract type shots. They show the viewer repetition and similarity. Repeating patterns and textures create rhythm for the eye, so the viewer's brain can easily absorb. It is good to add something to break up the pattern to create a little more interest within the shot - like a piece seaweed on a group of similar beach pebbles. Fill the Frame The concept of filling the frame in photography means that you crop out all distractions and focus on the subject. What story are you trying to tell about the subject and what do you really need the viewer to know? If you don’t really need to know all the background, then leave it out. Keep in your image everything that helps you tell the story and remove everything that does not tell the story. Don't distract your viewer with unnecessary information. Rule of Thirds The rule of thirds is the most basic composition element. Simply, this just means to break your image into nine parts (by adding or imagining two vertical and horizontal lines across your scene. The intersection of the vertical and horizontal lines (top right junction, top left junction, bottom right junction, and bottom left junction) are great places to position your subject because they will naturally draw your viewer's eye. Why is this important? If you place your subject in the exact middle of a photo, it is static and the viewer does not need to move their eyes around the shot. Remember you are an artist and the objective is to get the viewer to spend more time with you photograph. To do that, try to encourage the viewer look around your shot versus just looking in one place (the middle). Check out this article to learn more about the Rule of Thirds, using gridlines, and placement of your subject along the quadrants of a shot. Smartphones and digital cameras will allow you to turn on a grid lines setting to help show the Rule of Thirds on your screen. You can add the grid lines by opening your smartphone camera application, going to settings, and toggling on grid lines (exact steps depend on your phone). Since taking this class, and turning on the grid lines on my camera, it has really helped me in framing shots. I recommend using grid lines! Composition Closing Thoughts I have also found that changing the angle or perspective of your image can be impactful to the composition of your shot. Such as squat down and shoot up at your subject from below. Or hold the camera above your head and shoot down on your subject. Or consider walking around your subject (when possible) and taking images from multiple sides as well. I have been surprised to see how adjusting the angle and perspective can sometimes make your image feel completely different. Finally, try applying several of these compositional elements together in your shot - these are not mutually exclusive! They are like tools in a toolbelt and you can choose when you need one or many tools. You'll notice below in my examples that most include several compositional elements together. These are all generally accepted principles of photography, but you are the artist and there is no 100% right way! First and foremost the photo should please your eye and make you happy. So, do what you like regardless of what the principles say.
LightNow that you have learned how to compose a good shot, the next important topic is using light in your image. As a photographer you record light. Photography is nothing more than exposing light on a piece of film. Or, in the modern days now, exposing light on the sensor of your smartphone camera or digital camera. Wow, I had forgotten this concept and mind blown again! Exposing of light on film seems clear, but with smartphones now it is much less obvious. The one thing I already knew about light is that it can make or break your shot. Early on I began to notice when the lighting was too harsh, the sun was in a bad spot, or when shadows got into my frame. When you get home from an outing and review your photos, these things become pretty obvious. From an artistic standpoint, you can use light to set the mood of your photo and even help tell your story. Not surprisingly, a darker shot creates mystery while a lighter shot creates hope. Always remember, the bright area of the photo will attract the viewer's attention first. If the light in the photo is too bright, it will draw the viewers attention away from the rest of your image. There are four types of lighting to be aware of and learn to use in photography: Front, Side, Back, and Diffused. I have outlined each below, followed by my personal examples to help illustrate. Bonus: see if you can also identify the compositional elements used in each photo (I won't tell you this time). Front Light is at the front of the subject, but the back of the photographer. Not surprisingly, font light will light the subject very evenly and is good for colorful scenes. However, watch out for too much direct light which can cause the scene to lack texture and depth. Side Light is at the side of both the photographer and the subject. Side light creates light on one side, but shadow on the other side. Find the best sidelight at the beginning and end of the day when the sun is low in the sky. However, watch out for really harsh shadows which can ruin your shot. Back Light is at the front of the photographer, but the back of the subject. Provides high contrast in highlights and shadows. It creates silhouettes and shadows, which emphasize the shape of the subject. If the background is too bright you can loose the shot and it becomes "washed out" or too bright white. Diffused This type of light occurs when something is between the light source and the subject. Clouds and shadows are the best methods to diffuse light. Diffused light softens the highlights and keeps your shot from feeling harsh. Faces, forests, flowers, and waterfalls are all great with diffused light. Lighting Closing Thoughts If you are outside and using the sun as your primary source of light (which I always am), there are a few key drivers of when you will likely experience these types of lighting. The time of day directly impacts how harsh the sun appears. You can expect morning and evening to be milder light, while mid-day is often very harsh light. Weather plays a big impact. Is there cloud cover, rain, or fog? Or is it a cloudless day? Location and geography are also important. Are you in a dark forest, on an exposed mountain, or in a deep valley that casts shadows? Of the above four types of lighting diffused light has become my favorite! With all the clouds, rain, and forests of the Pacific Northwest, that happens to be the light we get a lot out here!
ExposureNow that you know about types lighting, how do you actually expose the right amount of light on your film or camera sensor? If that sounds confusing...yeah, here is where it kind of gets complicated. On today's smartphone cameras the answer is - the software takes care of exposure for you! For the most part, you don't need to know how it works (if you don't want to). If you are curious to know the exposure for a particular photo on your smartphone you can view that data by opening the picture and looking for Details or File Info (or similar depending on your phone). I am definitely no expert here, but I'm glad to now have a basic understanding of what is going on behind the scenes of my camera phone software. The best way to understand exposure is to think of the camera like the human eye. The eye has a lens which focuses on its subject and a pupil which expands and contracts to let in more or less light to your eye's lens. Similarly, a camera has a lens and uses three variables (functioning similar to the pupil of the eye) to control the amount of light let in to the camera's lens. You may hear these variables referred to as the exposure triangle. I have outlined each below, followed by a personal example to help illustrate. 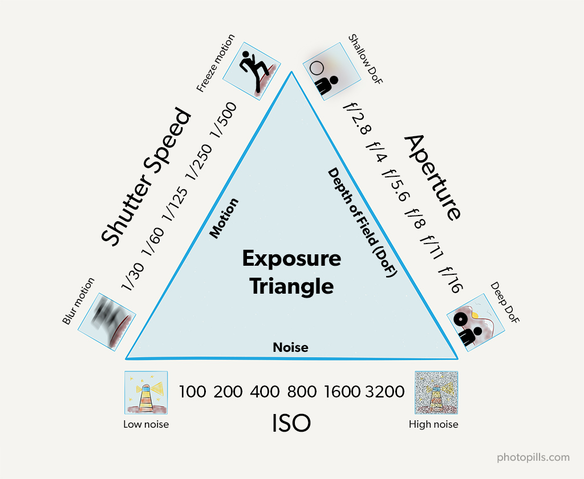 Aperture Aperture describes the opening that allows light to pass through the camera lens to your camera's sensor. Aperture directly impacts the depth of field of your shot - or the depth/distance that objects in your shot are in focus. The smaller the opening, the less light that comes through, but results in a larger depth of field. The wider the opening, the more the more light that comes through and the depth of your shot will be much shallower. Shutter Speed Shutter Speed is how long the shutter is open when "snapping" the photo. Shutter speed directly impacts how motion is depicted within your shot. A faster shutter speed lets less light in to your camera's sensor and serves to freeze your subject in that moment in time. Whereas a slower shutter speed lets more light in and blurs motion due to the fact that your image has more time to move in that instant the image is captured. ISO ISO is your camera's (film/sensor) sensitivity to light. ISO directly impacts how much "noise" is picked up in your shot. The higher the ISO, the more sensitive your camera sensor is to light, which leads to a grainy image. While a lower ISO makes the camera less sensitive to light and provides a sharper image. Focusing Light on the Camera Lens It is not enough to just expose light right, but you also need to focus the light correctly on the camera lens. I will talk briefly about each next. Focus: When taking a photo, the smartphone camera software will automatically detect the area of focus for your scene. Meaning wherever the lens is focused will be crisp and "in focus" while areas outside of that will not be as sharp. Smartphone cameras actually do give users the ability to manually control the focus of their images, called "tap to focus". To do that, simply compose the image you want to take, then tap on the phone screen where you want the camera lens to focus. You should see a round circle appear on the screen indicating the area of the image that will be in focus. Most of the time I don't remember to tap to focus and simply let the camera software control the focus automatically. But tap to focus is useful if you have an unusual subject and you are not confident that the camera will focus on it automatically. Lens: Today, all smartphone cameras have multiple lenses. My phone has three lenses, but some newer phones even have four lenses now. Generally these lenses are different sizes and allow you to switch from close (telephoto), to medium, to wide angle shots. The aperture (depth of field) changes with each different lens. The only way you should zoom with with a smartphone camera is by switching between these fixed lenses in your smartphone. Never zoom by pinching the smartphone camera screen. Doing that causes the focus of light into your camera to not be at the center of the lens. Since the light is not focused correctly on the camera lens, the image will be blurry. If you have the urge to zoom - move to a smaller lens on your smartphone or physically get closer to the subject (zoom with your feet). If that is still not close enough, take the shot as best as you can then use a photo editing tool to crop the image later (to effectively zoom in on it). Editing It is worth noting that there are many photo editing applications which can help you to adjust the exposure of your shot after the fact. Personally, I don't use any additional photo editing applications (mainly I don't have time for it). For smartphone photography, your phone will have a built in editing tool to crop, filter, and make some manual adjustment to the look of your image. I have also heard that Snapseed (a Google app) is a great tool for quick and easy smartphone photo editing. For more advanced purposes, many people use the Adobe Lightroom editing tool. Exposure Closing Thoughts For smartphone photography your camera is automatically calculating what it thinks is the focus (subject) and correct exposure of light for the scene (aperture, shutter speed, ISO). So #nofilter = no such thing. There is so much software behind the scenes of your smartphone camera that nobody is taking a pure optical image. Your smartphone has always done something to your shot (by adjusting the aperture, shutter speed, ISO). Luckily the smartphone software is really good these days! So if nothing else, at least you know! If you wish to get more advanced and start manipulating exposure yourself, many smartphone cameras actually now have a "Pro" mode where you can manually control the individual exposure attributes. Below is a personal example to help illustrate how the three elements of exposure impact your image. Refer back to the exposure triangle diagram above as needed. On two different days I photographed the same boat. Image 1 was taken in the early afternoon on a cloudy, but bright day. Image 2 was taken at dusk, just after sunset. The better shot of the two is Image 1. Image 2 is overall darker and less sharp than Image 1 due to the dusk image being captured with a slower shutter speed and higher ISO. Let's compare the exposure of both images and see why. Note: I did not manually adjust either of these images, entirely the doings of the smartphone camera software!
Aperture: Both Image 1 and Image 2 have the same aperture of f/2.4 which indicates both photos were taken using the telephoto lens on my phone camera (the most close up or "zoom" lens of the three on my phone). If you are interested to know the size of each of your smartphone camera lenses, just do a quick Google search. Shutter Speed: Image 1 was captured with a shutter speed of 1/320, meaning the shutter stayed open to let light into the camera's lens for one-three-hundred-and-fiftieth of a second or six milliseconds. Image 2 was captured with a shutter speed of 1/4 or one quarter of a second. Image 2 used a much slower shutter speed than Image 1 because it was nearly dark and more light needed to be let into the camera's lens to properly expose the image. The slower the shutter speed the more still and steady you must be holding a smartphone camera. Any small movement, while the shutter is open, can blur your image. ISO: Image 1 was captured with an ISO of 50. This low ISO means that camera's lens could be less sensitive to light, as there was ample light in the sky for the image to be exposed. Image 2 was captured with an ISO of 500 meaning that the camera lens sensitive to light was increased because it was nearly dark and more light was needed to properly expose the image. The higher the ISO the more grainy and less sharp the image will appear. Practice and ReviewIf you use the mental model above - think like an artist, learn to compose a good image, and understand the lighting impacts - I guarantee you will take better smartphone photographs. If you want to get more advanced by manually adjusting your camera's exposure settings, then go for it (but not not required)! My advice is to get out there and... Study Continue to gain familiarity with the key principles of composition and light by studying the photos of others! Scroll through your social media feed (or the internet) and find photos that speak to you. Below are a few questions to help you learn as you look through the works of others:
Practice - But Don't Take the Same Photo Over and Over Go and take a ton of pictures and practice applying composition within your own photography! As a beginner you might be tempted to stand in front of something and take 10 identical photos of the subject. But you will not learn anything from 9 of those 10 shots because they are all the same! Instead you should take 10 different photos of the subject. Find a subject, compose one image then try composing the subject in a different way. Repeat as many times as you can think of different ways to compose the shot. Below are a few suggestions to get you started composing different shots of the same subject:
Analyze, Improve, and Enjoy Always come home and review your results! What worked and what didn't work? What do you like best? Taking photos, with different variations on the same image, is the only way to learn, figure out what you like or don't like, and improve! Sometimes you will know when you have captured a good photo. But, more often for me, I'm not sure what I captured until I get home and review. I guarantee you that when you review your photos at home you will have some gems you didn't even realize you captured. It is always fun to discover your new favorite image that you hadn't expected! Final reminder: embrace your inner artist and have fun with it! Thanks for reading and I hope you will now go out and capture even better shots in your own personal photography! 
Vickie
4/28/2021 08:12:28 pm
Sarah, you are mature beyond your years. Your photos are absolutely gorgeous. Your “communication skills” are role model quality. Comments are closed.
|